1Home Server KNX Pro - Quick start
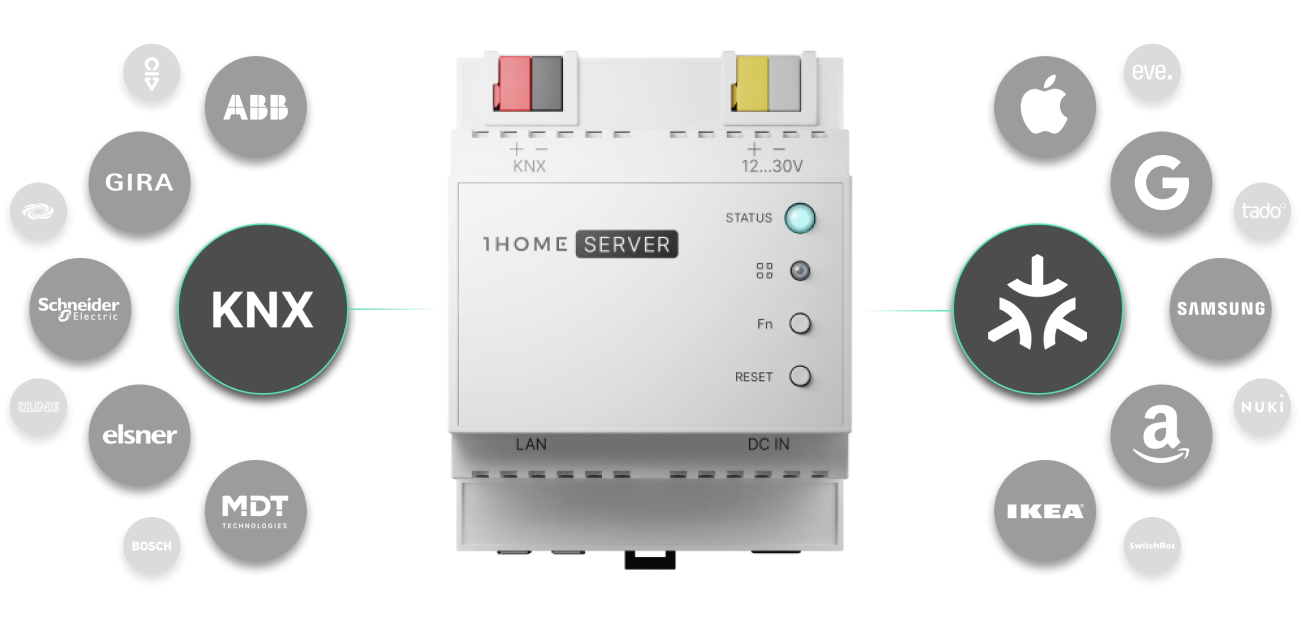
The 1Home Server KNX Pro is the central brain of a modern KNX smart home.
Quick Setup
Table of contents
🎬 Video tutorial
Follow our video instructions on how to set up your 1Home Server.
1. Installation
To start using your device you need to provide it with power and connection to your network.
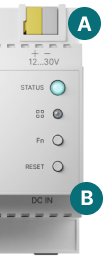
Connecting to power
There are two options to connect your device to power:
- A - Auxiliary power: Use the yellow and gray pin to connect to auxiliary power. Normal usage at 30V is around 70-100 mA, max usage is up to 170 mA. Note that if the power supply can't supply enough power for all connected devices it might cause unexpected behavior.
- B - DC IN power supply: Connect a dedicated 12V, 2.1 mm, 1A (or more), 12W power supply.
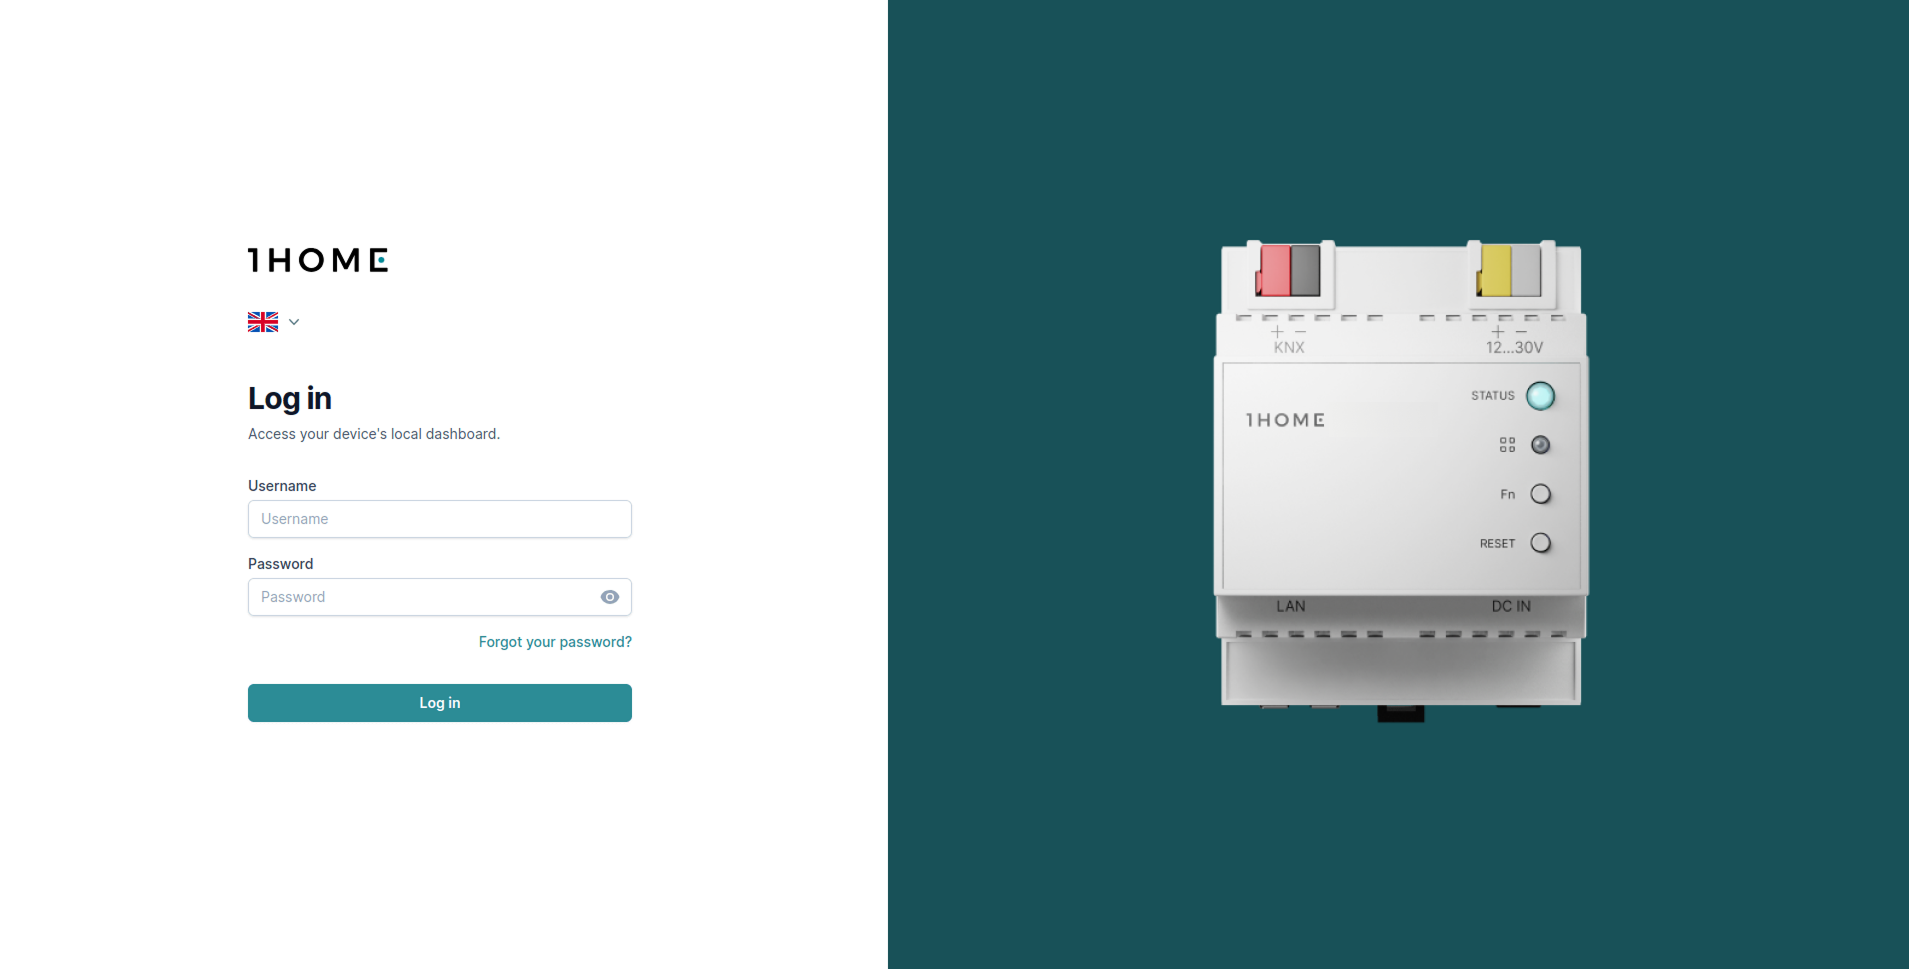
Accessing the dashboard
Once the device is powered on and the STATUS LED light is solid green color 🟢 you can access your 1Home Server at 1home.local URL.
If you have troubles accessing the dashboard, read the Troubleshooting guide.
You should be presented with the login screen as shown below.
Default username and password are printed on the label that you received with the device. Consider changing them after you log in.
2. Connecting KNX
Connecting to KNX bus
🎬 KNX video guide: Add device manually, ETS auto detection
Your device is automatically connected to your KNX bus via the red and black pin.
You can also always add up to 4 additional connections to KNX via KNX IP interfaces. Learn more in the Connect to KNX guide.
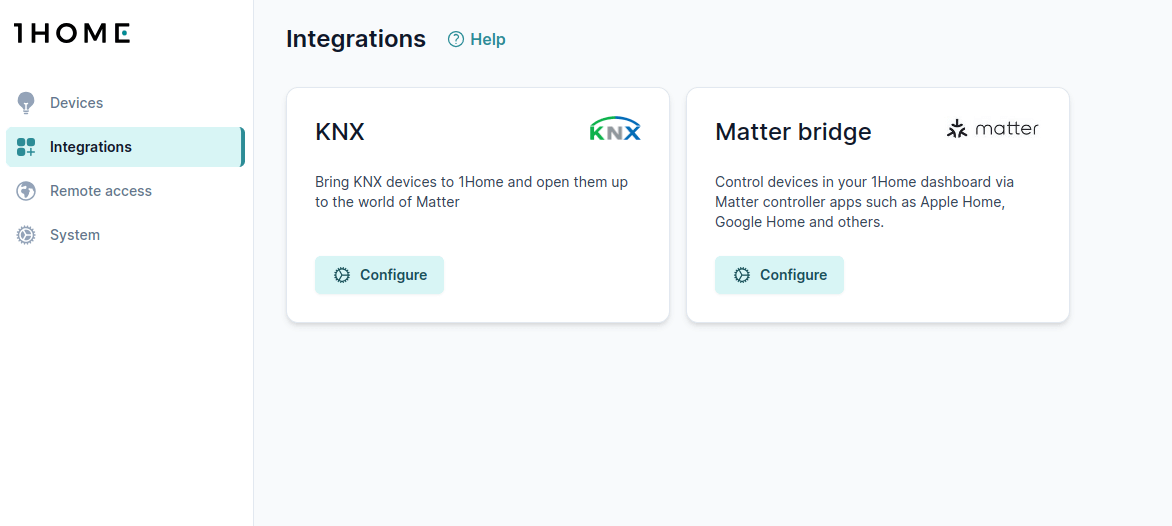
You can check the connection status of your device under Integrations -> KNX as shown below. 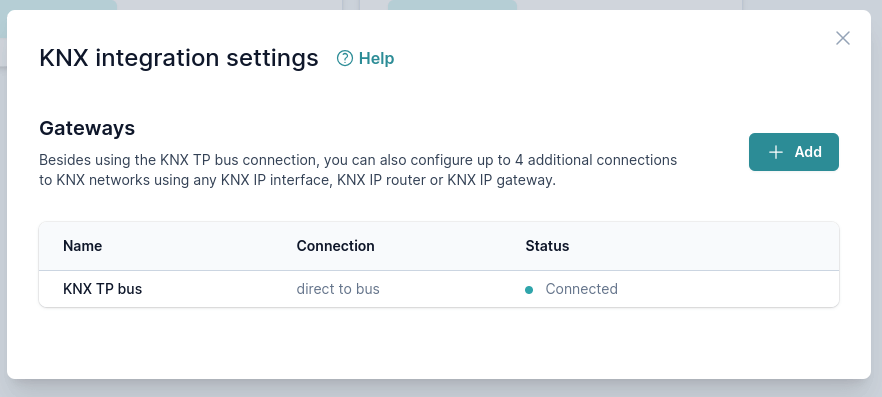
Adding devices
There are two ways in which you can add your KNX devices:
- Auto detect devices from your ETS project file
- Most of your devices will be automatically detected from your
.knxprojfile. You will also be able to change the detected devices after the import is finished.
- Most of your devices will be automatically detected from your
- Add KNX devices manually one by one
- If certain devices were not detected by ETS auto import, you can add them manually.

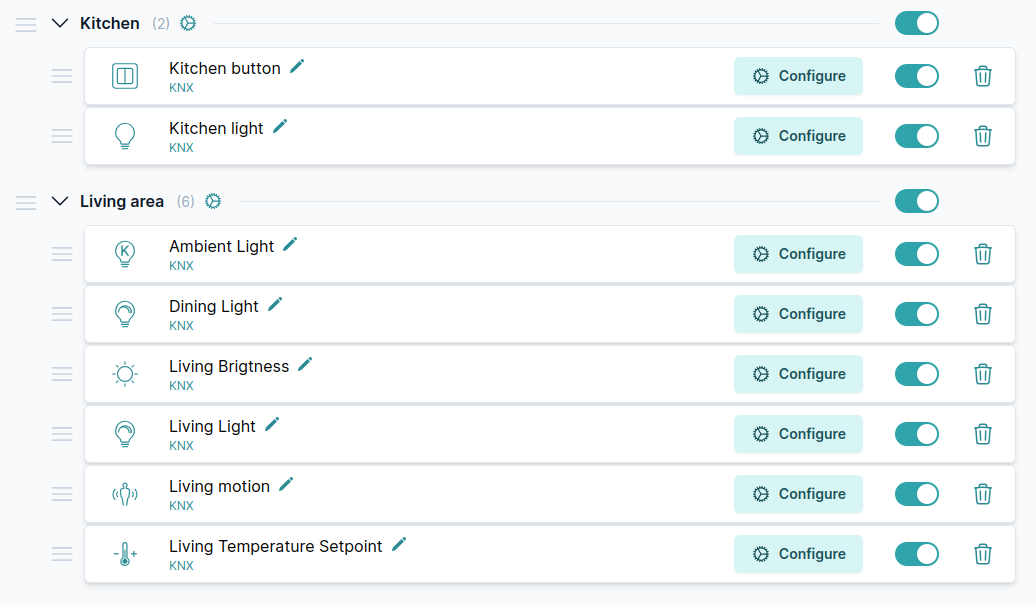
After adding your devices, you will see a list of added devices.
3. Use 1Home Mobile App
You can also use the 1Home Mobile App, which does not require any additional hardware to run.
It also works both locally and remotely.

4. Connecting Matter
Pairing your device to Matter apps is stunningly simple.
First you need to enable pairing mode on your device. Pairing mode is automatically enabled after the device boots, but is automatically turned off after 15 minutes for security reasons. So it is best to always check if the paring is enabled with the following steps.
1. Enable pairing mode
Click on the Integrations tab. Then under the "Matter Bridge" integration click on Configure.
Under "Connected apps (fabrics)" click on Pair button and follow the steps until you see the QR code a shown below.
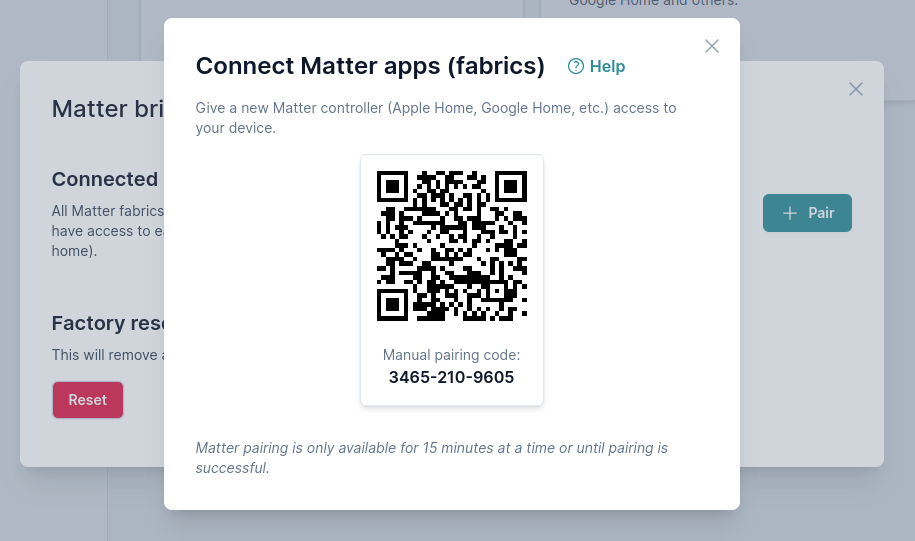
Scanning the QR code in the picture above won't work. 😉
You can now scan your QR code with your favorite Matter app. You can also scan the QR code on the printed label that you have received in the package.
2. Scan the QR code with Matter app
TIP
Note that all Matter apps need a physical hub in your home for Matter to work. This is a necessary step that enables Matter to work locally without needing a cloud connection.
All Matter apps have a very similar pairing workflow. Follow the guide to pair your favorite Matter app:
If you want to re-add or unpair your Matter app make sure to follow our Pair/unpair Matter apps guide, since there are a couple of gotchas to be considered.
That is it!
Now you can start using your Matter capable smart home. 👏 🚀
5. Create custom schedules, automations and scripts
Read more about drag and drop 1Home Automations and advanced Lua Scripting.
Use 1Home Automations to create schedules, triggers, conditions and more.
Usually drag and drop editor is enough, but if you want something really custom, you can also use Lua scripting.
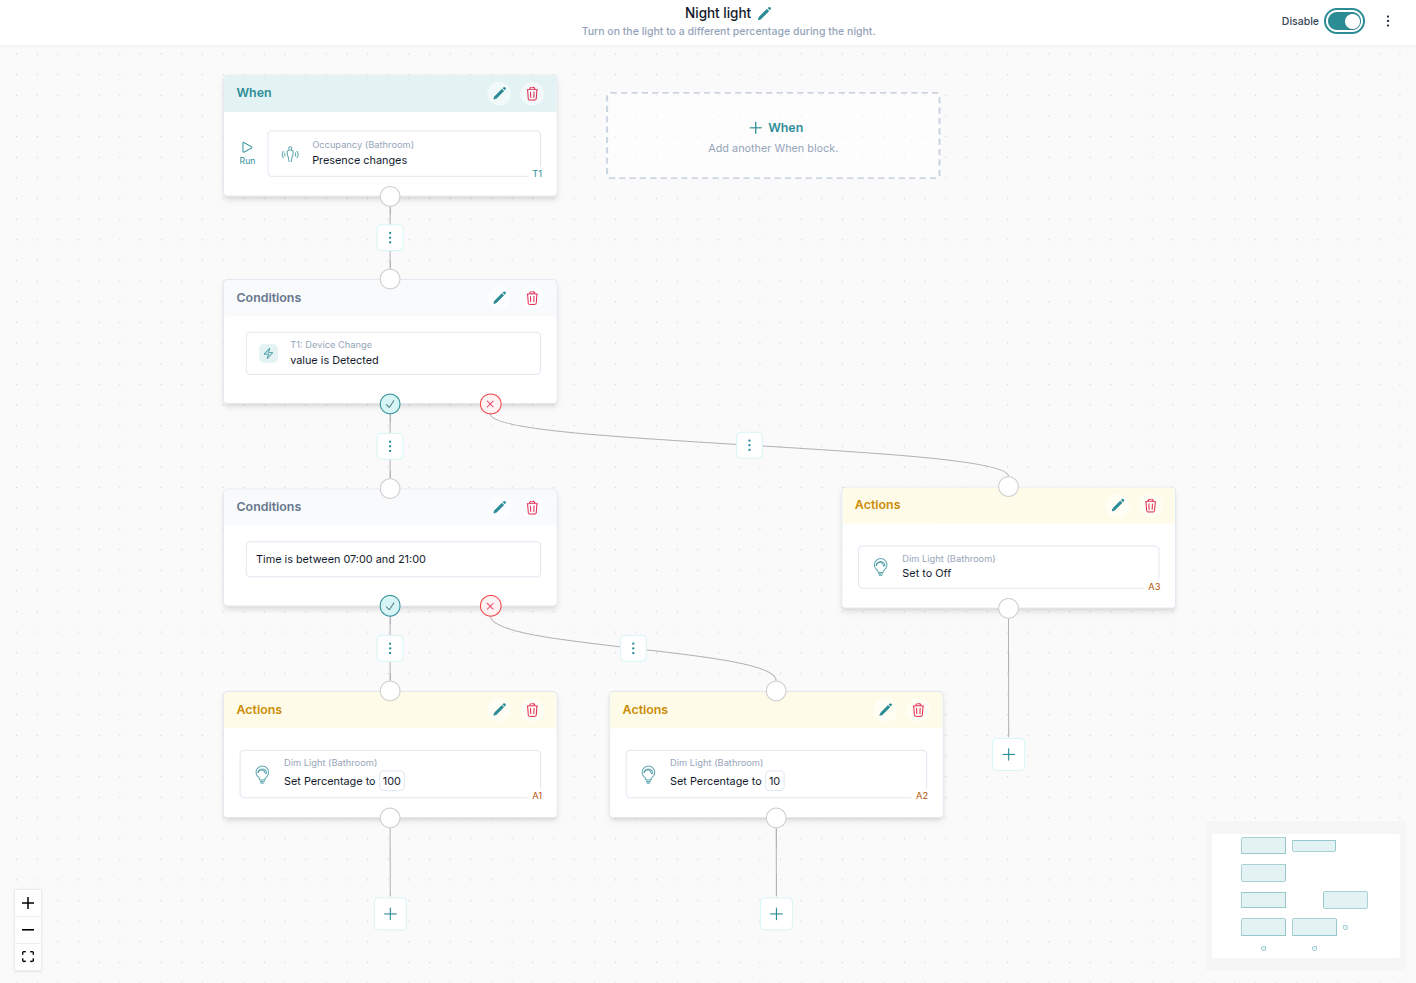
Drag and drop automation editor

Advanced Lua editor
6. Visualize data with graphs
Read more about using Graphs.
Visualize the data from your devices, energy consumption or specific KNX group addresses. View automatically generated graphs or create custom graphs with many different items displayed at the same time.
Want to see thermostat setpoint, room temperature and valve open/close operation all at once? No problem.
🎬 Video tutorial
Learn how to use graphs in 1Home.
7. Use KNX Traffic Monitor to monitor your devices
Learn how to use Traffic Monitor.
See what traffic is being sent in real-time, or understand why something happened at a certain point in history.
You can also send KNX telegrams to the KNX bus directly from the dashboard.
🎬 Video tutorial
Follow our video instructions on how to use Traffic Monitor - both Live & History.
8. Configure device remotely
If you need to configure your 1Home device remotely use our 1Home remote dashboard at 🌍 remote.1home.io.
Follow our Remote access guide to get started.
9. Discover more features
- Matter accessories - integrate IoT Matter devices to 1Home and KNX.
- 1Home Mobile App - the 1Home's specialized smart home mobile app.
- KNX (ETS) remote programming - program with ETS from anywhere in the world.
- KNX Time Server