KNX remote access
Remotely connect to your KNX project and program it via ETS software. From anywhere in the world.
Important
If you are using a software version of the 1Home Server that is older than v5.0.0, please consider updating your 1Home Server to the latest version. Otherwise here is a reference to the older generation of the ETS remote programming (legacy documentation).
Table of contents
How it works
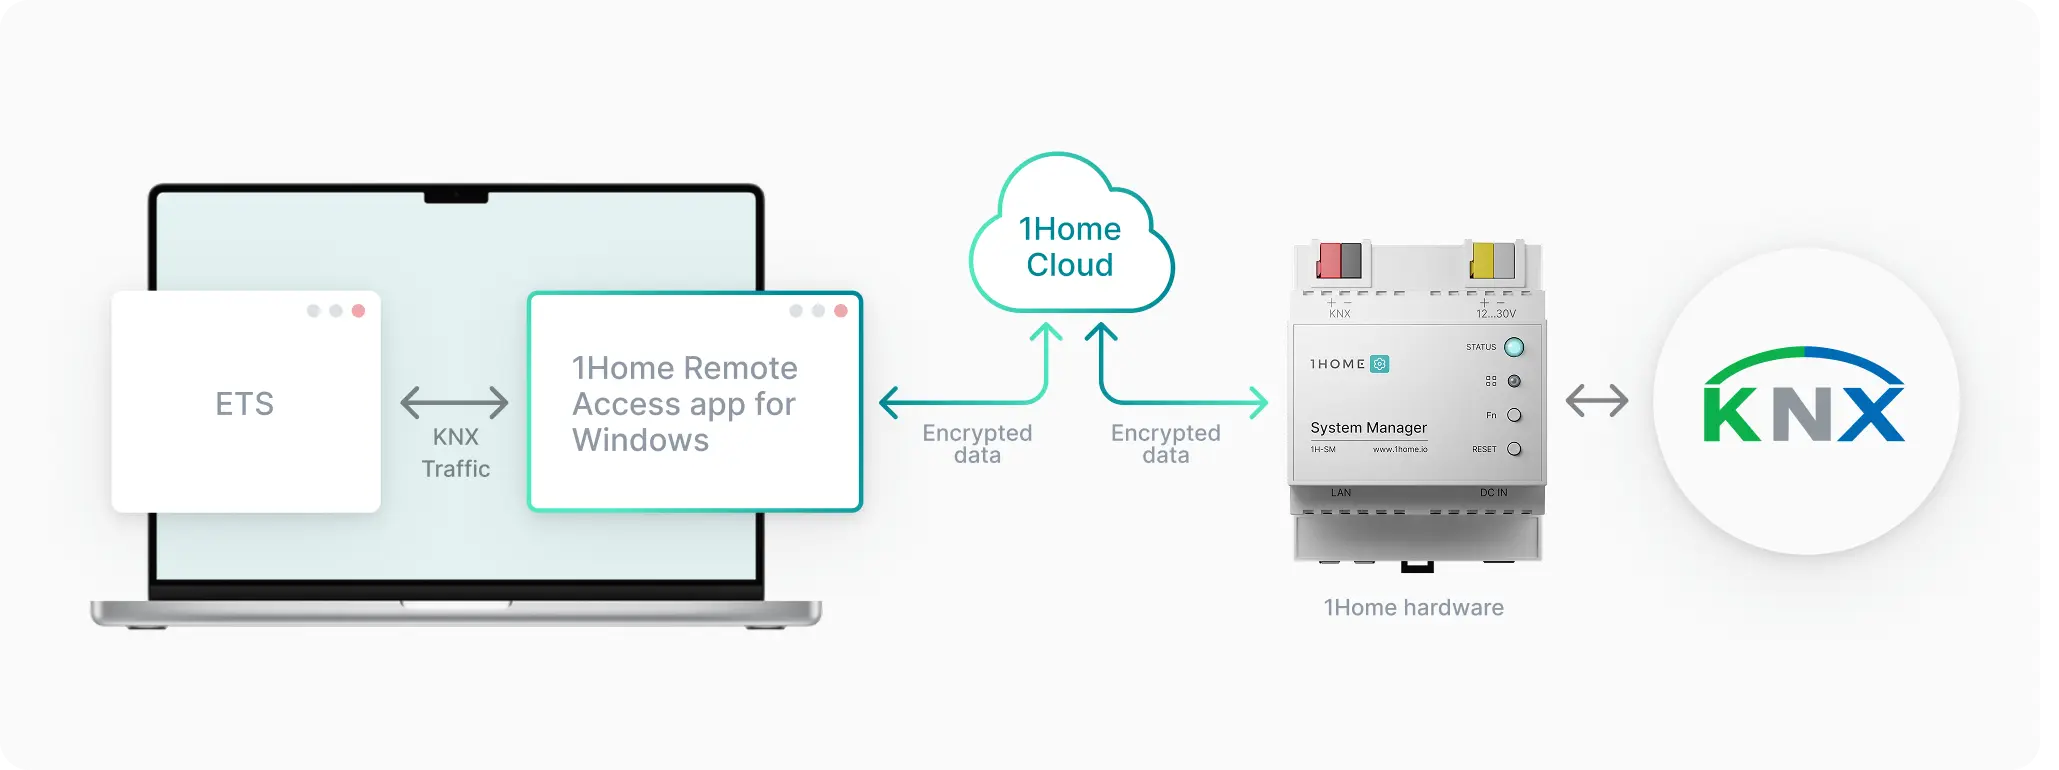
With the release of the v5.0.0 we have made large updates to the ETS programming software.
This now offers:
- Optimization for worldwide use - 1Home cloud servers that facilitate the connection between the ETS software on your computer and the 1Home installation now offer more locations for faster connection, for example cloud servers in Germany and Singapore.
- Improved reliability & security - KNX protocol was developed to communicate on the local network which is fast and reliable, unlike internet. With the 1Home RemoteAccess app for Windows we are able to add additional levels of reliability and security via encryption to the connection over the internet. We expose the KNX traffic solely between the ETS application and 1Home Windows Application.
Prerequisites
If you haven't already, first follow the guide to setup 1Home remote dashboard and connect your 1Home Server.
Setup KNX Remote access
Follow the steps below to create a new KNX remote connection:
- Login to your account in remote.1home.io and open the project where you want to establish KNX remote access.
- In the selected project, click
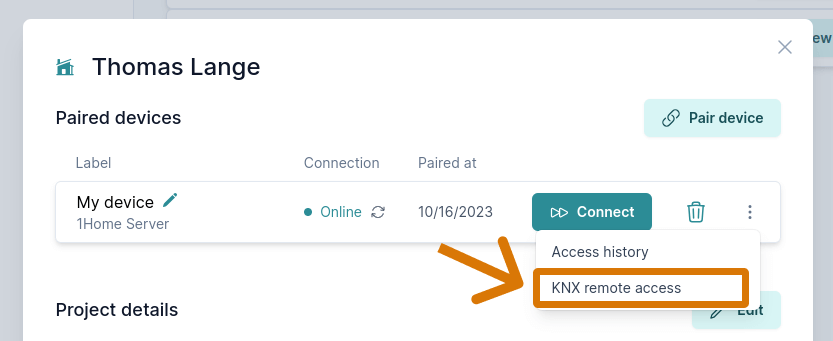
Viewto display the project details and see a list of connected 1Home devices. - Click the three dots (⋮) and select
KNX remote access, as shown below.
A screen similar to the one below will appear.
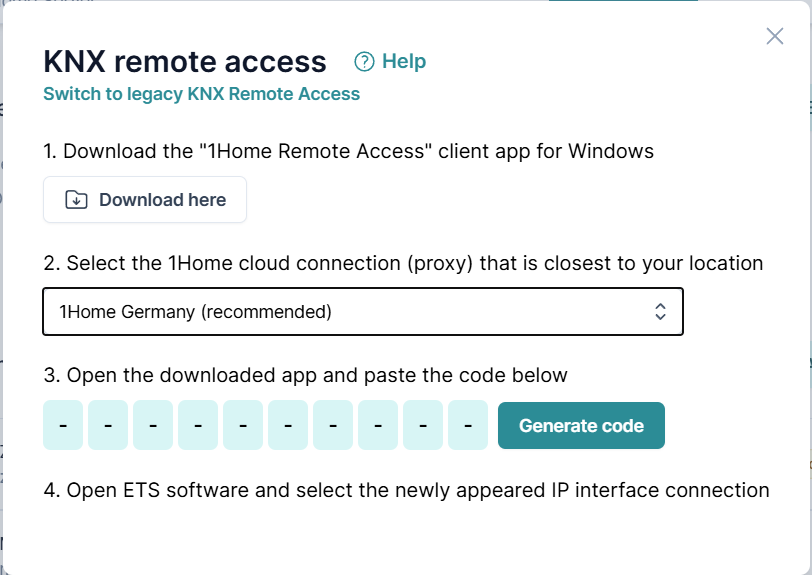
Download the 1Home Remote Access app for Windows here.
Select the 1Home cloud connection (proxy). The system suggests the closest cloud server to your location but you can also select it manually.
Click
Generate code. The 1Home Server will immediately connect to our KNX Remote Access Servers, and a PIN code will appear.
You now have 120 seconds to enter this PIN into the 1Home Remote Windows App and click Connect. After 120 seconds, the PIN expires and must be regenerated if the connection was not established.

Once the connection is established, you’ll see detailed information about it. If both the 1Home Remote App and 1Home Server are shown as connected, your remote access is ready to use.
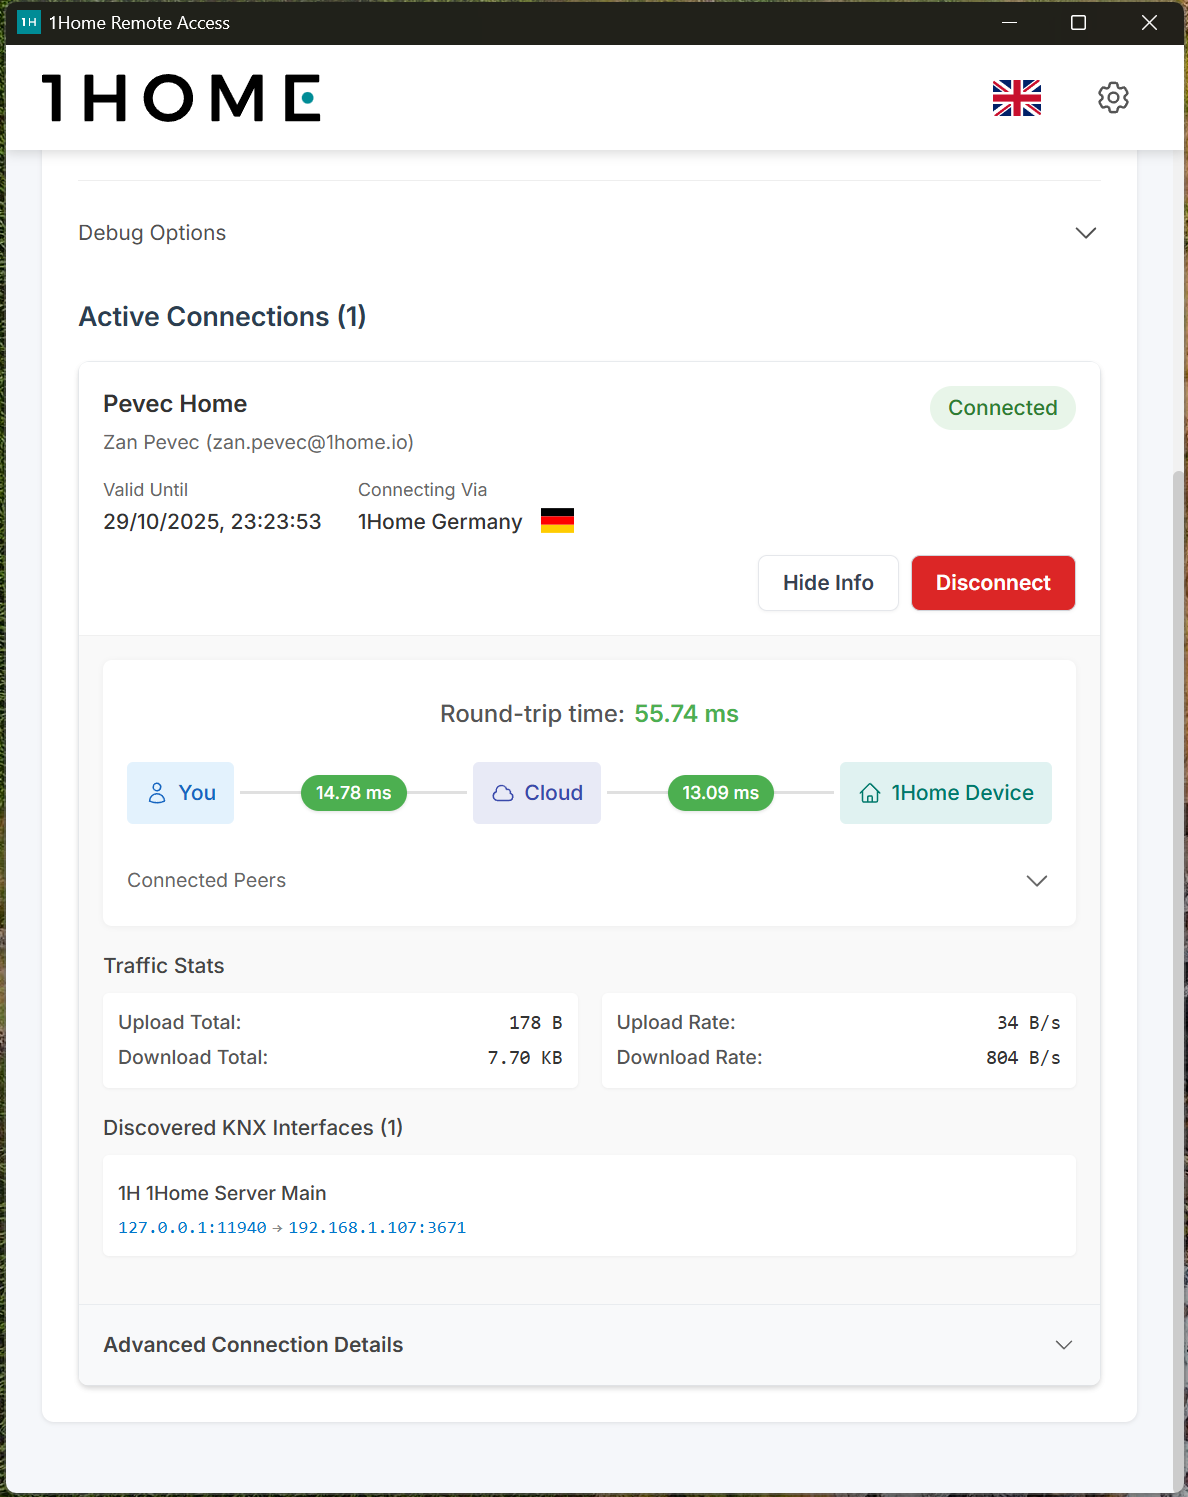
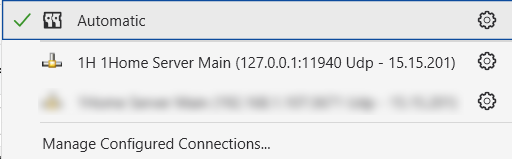
- Now open up the ETS software on the same computer where the 1Home Remote App is running. At the bottom of the information page, you’ll find a list of KNX Interfaces discovered by the 1Home. These interfaces will automatically appear in your ETS and can be used like any standard local KNX IP interface.
Disabling KNX Remote Access connection
A KNX Remote Access connection remains active for 12 hours.
After this period, it must be renewed.
When you’re done using KNX Remote Access, simply close the app — the connection will automatically terminate.
KNX Remote App for Windows
You can download latest version here.
All versions
| Version | Release Date |
|---|---|
| v1.2 | 2025-11-19 |
Common Issues
Below are some common issues and their solutions when setting up or using KNX Remote Access.
I can't connect
Verify matching IP addresses. You must open the Remote Dashboard from the same IP address that the 1Home Remote Windows application will use to establish a connection to the KNX Remote Services.
Windows Defender found threat
Windows Defender may mistakenly flag the 1Home Remote Access app as a potential threat. Rest assured, the app is safe and you can safely ignore this warning.
I can't program certain actuators, some telegrams are not visible or errors are shown
There are a couple of things to try:
- Follow the Program KNX with IP interface to reserve individual addresses for use from 1Home Server.
- Line couplers - Make sure that no line couplers are between the 1Home Server and the KNX device that you are trying to access. If the line coupler is present, to investigate if it is causing the problem, try disabling any filtering on the line coupler and trying again.
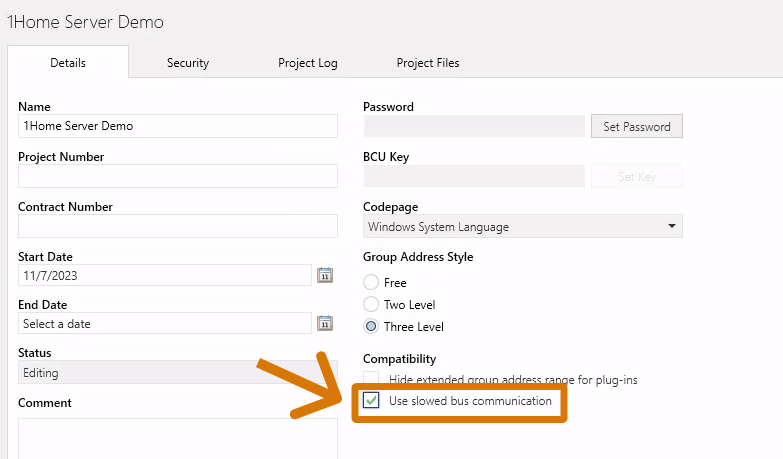
- Enable slowed connection - Open the project settings (image below) and turn on slowed connection for this project. This should help resolve potential issues that are a result of a not optimal network connection.